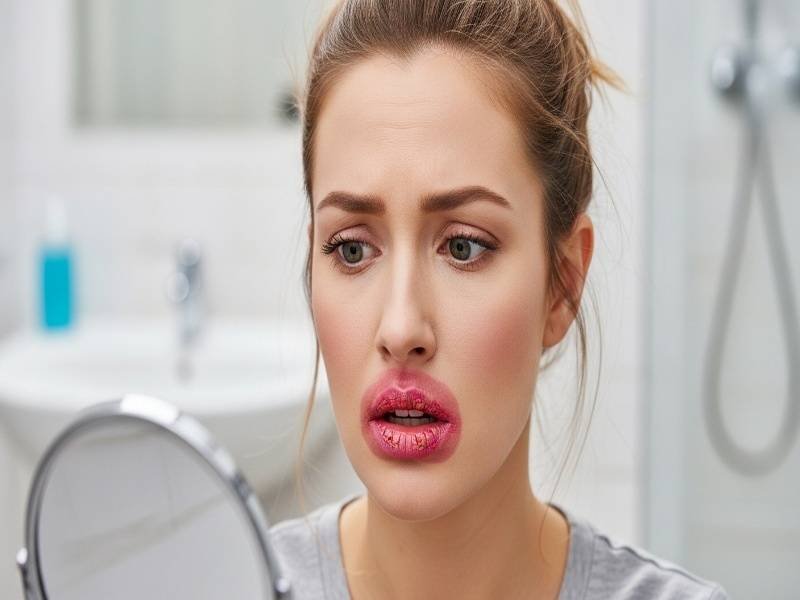
I’ll never forget the time I bought this gorgeous, deep mahogany lipstick for a winter wedding in New York. On the bullet, it looked like pure luxury. But when I swiped it on, it was a total disaster. It looked dark in some spots and almost sheer in others—it was the definition of Patchy Lipstick. I kept adding more and more layers, trying to “fill in the holes,” but it just became a thick, sliding mess.
I almost gave up on dark colors entirely until I discovered the Layered Swipe Technique. In 2026, we’ve moved past the “heavy coat” era. If you want Full Coverage that actually looks like a second skin, you have to treat your lips like a canvas.
This concern is covered in our Lipstick Care & Tips section, where we explain common lipstick problems and how simple prep steps can prevent them.
Why Does My Lipstick Look Patchy?
Before we fix it, we have to understand the “why.” Patchy Lipstick usually happens because our lips aren’t a flat surface; they have different textures and moisture levels. When you do a single, heavy swipe, the wax sticks to the dry patches and slides off the hydrated ones.
The secret to Even Lip Color isn’t more product—it’s the “Glazing” approach. This is the technique of applying thin layers of translucent paint called glazing in the art world, and it works exactly the same for your pout. By building thin, transparent layers, you create depth and richness that a single thick layer can never achieve.
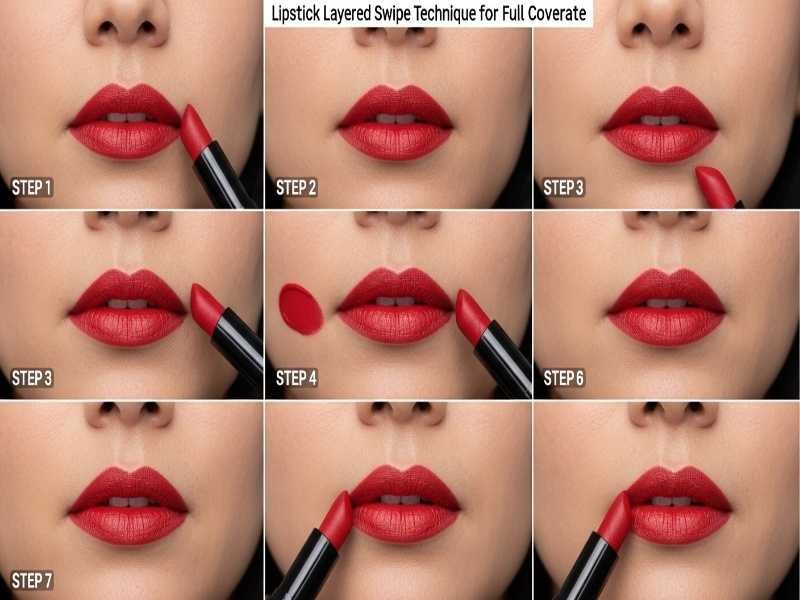
The Layered Swipe Technique: Step-by-Step for Full Coverage
To get that professional, “airbrushed” finish, you need to abandon the idea of a one-step application. Here is how to fix the patches for good:
1. The “Ghost” Layer
Instead of going in full-strength, take your lipstick and lightly “stain” your lips. Think of this as your “thin translucent film of color.” This layer doesn’t need to be perfect; its only job is to provide a “grip” for the next layer.
2. The Blot & Bond
Take a single ply of tissue and press it against your lips. This removes the excess oils that cause sliding. If you’ve read our guide on the , you know this is the secret to making the color stay put.
3. The Precision Swipe
Now, apply your second layer. Because the “Ghost” layer has already bonded to your skin, this second swipe will lay down much more evenly. For a truly professional finish, use the edge of the bullet to fill in any remaining gaps. This is how you achieve Full Coverage without the weight.
Glazing vs. “Impasto”: A Beauty Perspective
In art, there is a technique called when you apply thick layers of acrylic paint to create texture known as impasto. Many women accidentally use the “impasto” method with their lipstick—piling it on thick to hide mistakes.
However, for your face, the glazing technique is far superior. Which technique involves using thin transparent layers of color to build up depth and richness? It’s the Layered Swipe Technique. It allows the light to reflect through the pigment, making your lips look vibrant and alive rather than “blocked out” by a heavy layer of wax.
If you’re wondering if you should stick to a simpler method, you might want to compare the to see which one suits your specific lipstick formula. Generally, the darker the shade, the more you need to layer.
How to Maintain Even Lip Color All Day
The biggest risk of Patchy Lipstick is how it wears off. If you have one thick layer, it will “flake” off in the center. But when you build your color in layers, it wears off as a soft stain.
Even after a lunch meeting in downtown LA or a coffee run in Seattle, your lips will still have that base “Ghost” layer visible. You won’t have to start from scratch; a quick, light swipe will bring the Full Coverage back to life instantly.
Final Thoughts: The Art of the Perfect Pout
Fixing Patchy Lipstick is all about patience and “thin-to-thick” application. Once I stopped trying to rush the process and started using the Layered Swipe Technique, my “lipstick anxiety” disappeared. I no longer check the mirror every ten minutes to see if my color has separated.
Embrace the art of layering. Treat your lips like the masterpiece they are, and you’ll never have to settle for a streaky, uneven finish again.
❓ Frequently Asked Questions (PAA Style)
1. How to fix patchy lipstick? The best way to fix Patchy Lipstick is to blot off the excess oil and apply a fresh, thin layer using the Layered Swipe Technique. Avoid adding a thick layer over an existing one, as this will only create more texture and unevenness.
2. What is the technique of applying thin layers of translucent paint called? In both art and makeup, this is known as Glazing. In lip application, it involves building up color using multiple thin “washes” of lipstick to create a luminous and Even Lip Color that lasts longer.
3. Which technique involves using thin transparent layers of color to build up depth and richness? This is the Layered Swipe Technique. By using 2-3 very thin layers and blotting in between, you build a “reservoir” of pigment on the lips that looks much deeper and richer than a single heavy coat.
4. What is a very thin translucent film of color painted in layers called? In professional makeup artistry, this is often referred to as a Lip Stain or a Base Layer. It acts as a primer, ensuring that the final “Power Swipe” of lipstick has a smooth, non-patchy surface to cling to.
5. How do I get full coverage lipstick without it looking cakey? The secret is to use high-pigment formulas and apply them in thin stages. Start with a light “stipple” or swipe, blot away the wax with a tissue, and repeat until you reach the desired intensity. This ensures Full Coverage that feels lightweight.