How to Choose Your Perfect Nude Lipstick Shade Online (Without Swatching!)
I remember buying my first nude lipstick online. It looked perfect on the model, but when it arrived? Disaster. The “nude” turned orange on me. That frustrating experience taught me what I now know: you can find your perfect nude lipstick shade online without swatching—if you know the secrets.
At Womenclassy.com, we’ve helped thousands master online nude lipstick shade selection. This guide, part of our Nude Lipstick Shades series, gives you beauty insider strategies to choose perfect nudes every time.
Why Online Nude Shopping is Different
Choosing a nude lipstick shade online isn’t like picking bold colors. Nudes are subtle and personal. A red might be slightly off but still work; a wrong nude looks terrible. Success lies in understanding three factors: undertone, skin depth, and natural lip color.
First, visit our Lipstick Color Theory guide to understand color-skin interaction. This knowledge separates successful purchases from disappointments.
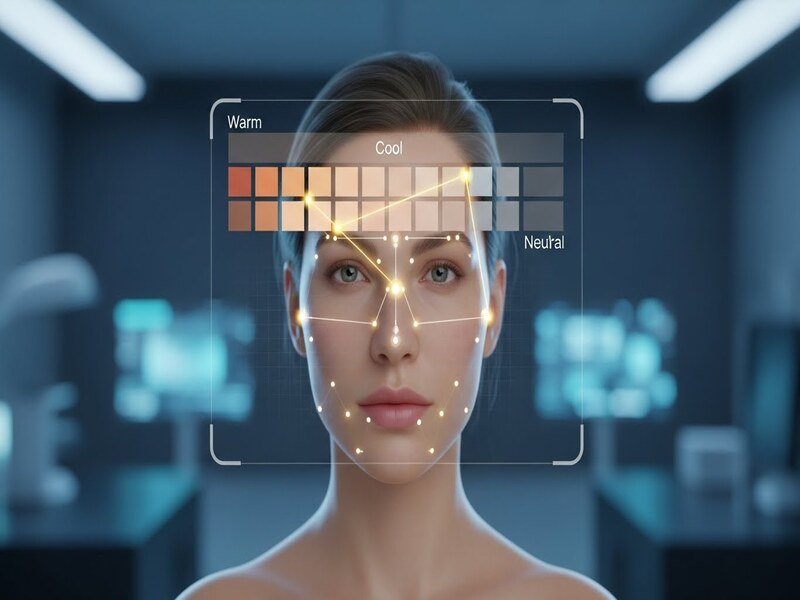
Step 1: Virtual Undertone Analysis
The Daylight Selfie Method:
Take a no-makeup selfie in natural daylight. Analyze:
Vein Check:
Blue/purple = Cool undertones
Green = Warm undertones
Blue-green mix = Neutral
White Shirt Test: Hold white near your face:
Skin looks yellow/gold? = Warm
Skin looks pink/blue? = Cool
Balanced? = Neutral
Jewelry Preference:
Silver better = Cool
Gold better = Warm
Both work = Neutral
💡 Pro Tip: Neutral undertones have most flexibility. Start with neutral nude lipstick as safest bet.
This crucial step is often overlooked. Your natural lip pigment alters how lipstick appears.
Bare Lip Analysis:
Take daylight selfie with bare lips. What color?
Pale pink: Nudes show true
Mauve/brown: Makes nudes cooler/darker
Peach/coral: Warms up nudes
Uneven: Needs opaque formulas
💡 Pro Tip: For highly pigmented lips wanting true color, look for “full coverage” formulas. Learn more in our why most lipstick shades look wrong guide.
Step 4: Decode Product Descriptions
Brands use specific language revealing what a nude lipstick shade actually looks like.
Undertone Clues:
“Warm,” “golden,” “peachy” = Warm
“Cool,” “rosy,” “mauve” = Cool
“Neutral,” “true nude” = Neutral
“Taupe,” “greige” = Cool-leaning
Depth Indicators:
“Soft/light nude” = Fair-light skin
“Medium/classic nude” = Light-medium
“Deep/rich nude” = Medium-deep to deep
Step 5: Model Analysis Technique
Never trust one model photo. Use this approach:
Find Your Match:
Look for models with similar:
Skin tone AND undertone (most important)
Hair color (affects contrast)
Age range (mature skin changes interaction)
Multi-Model Comparison:
If brand shows same shade on 3+ models, compare how it looks on:
Cool-toned fair model
Warm-toned medium model
Deep skin model This shows shade transformation across tones.
Step 6: Customer Photo Investigation
Customer photos beat professional shots. Use them effectively:
Filter by Skin Tone:
Most reviews let you filter by reviewer skin tone. Focus on matches.
Look for “Unexpected” Results:
Pay attention to reviews saying:
“Pulled more [color] than expected” = Reveals undertone
“Lighter/darker than pictured” = Shows true depth
“Not what I ordered but loved” = Shows versatility
Step 7: Safe Shopping Strategy
Start with Safe Bets:
Based on your analysis:
Cool Undertones: Start with cool nude lipstick shades described “rosy” or “mauve”
Warm Undertones: Start with warm nude lipstick shades described “peachy” or “golden”
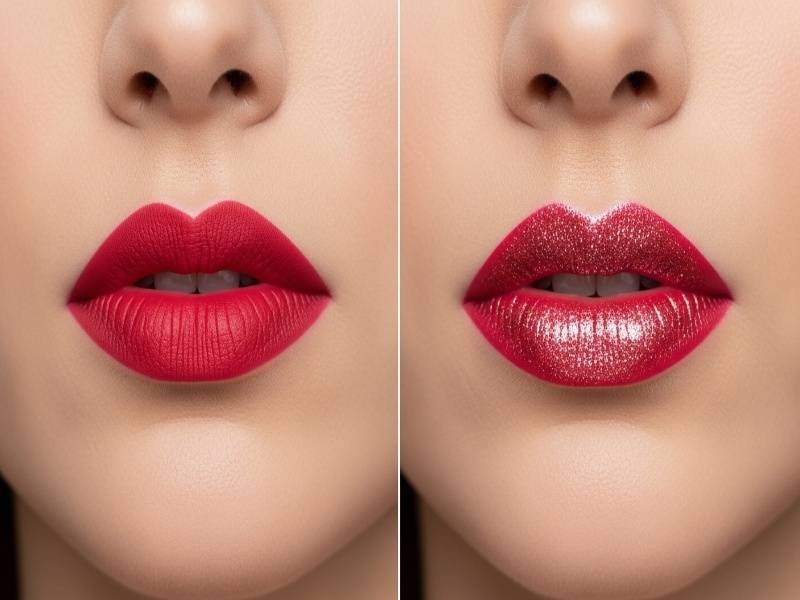
Formula affects how nude lipstick shade appears. Consider:
Matte vs. Creamy:
Matte: Shows truest to swatches
Creamy: Can appear different due to shine
Glossy: Hardest to judge online
Opacity Matters:
Sheer: Your lip color dominates
Medium: Blend of both
Full coverage: Closest to swatches
Final Checklist Before Buying
✅ Undertone analysis done ✅ Skin depth determined ✅ Natural lip color considered ✅ Multiple model photos reviewed ✅ Customer photos from similar tones checked ✅ Formula appropriateness considered ✅ Retailer reputation verified
If You Still Get It Wrong
Even experts make mistakes. Recovery plan:
Mixing Solution:
Most “wrong” nudes can be corrected:
Too orange + blue mixer = More neutral
Too pink + brown mixer = Warmer
Too light + deeper shade = Perfect depth
Layering Technique:
Use “wrong” shades as:
Base layers under other lipsticks
Mixing components for custom shades
Lip liners (apply all over first)
Your Success Plan
Month 1: Buy one “safe” nude based on analysis Month 2: Try one variation (lighter/darker) Month 3: Explore different undertone family Month 6: Curated collection of perfect nudes
Finding perfect nude lipstick shade online improves with practice. Each purchase teaches more about what works for you.