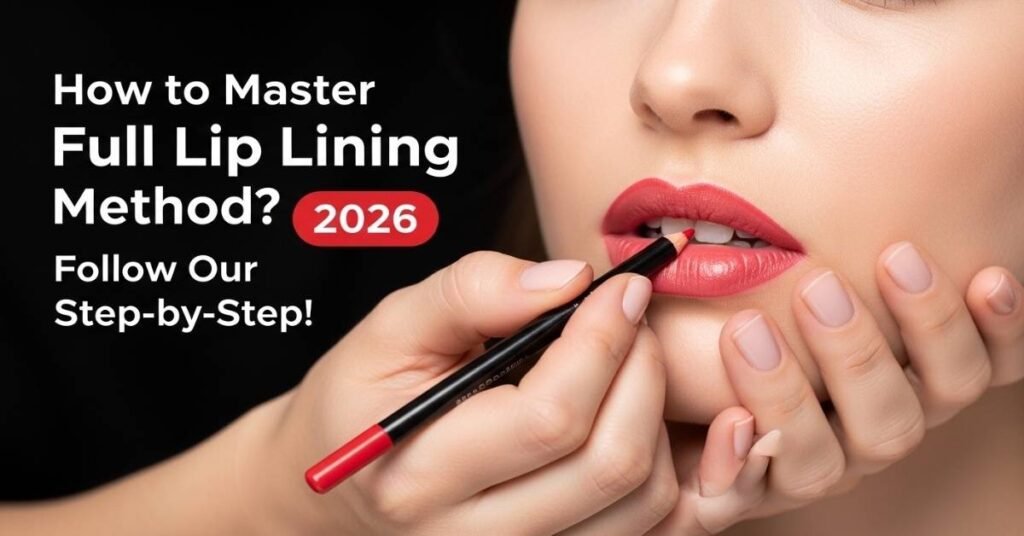
I remember being sixteen, sitting on a worn-out velvet sofa with my best friend, Sarah, as we obsessively watched old French films. We weren’t interested in the subtitles; we were mesmerized by the lead actress’s lips. They didn’t look “painted” or heavy. They looked soft, hazy, and as if she had just finished a bowl of ripe cherries.
I spent years trying to replicate that look with expensive lip liners and high-end brushes, only to end up looking too “done.” It wasn’t until I abandoned the tools and embraced the Finger Tap Application that I finally nailed it. In 2026, the obsession with “Quiet Luxury” and effortless beauty has brought this technique back to the forefront.
If you’ve ever felt that traditional lipstick makes you look too formal or masks your natural beauty, you are going to love the “Just-Bitten” look. It’s fresh, it’s youthful, and best of all, you already own the only tool you need: your own hands.
This step is part of our complete How to Apply Lipstick guide, where we break down each technique that helps lipstick apply smoothly and last longer.
What is Finger Tap Application?
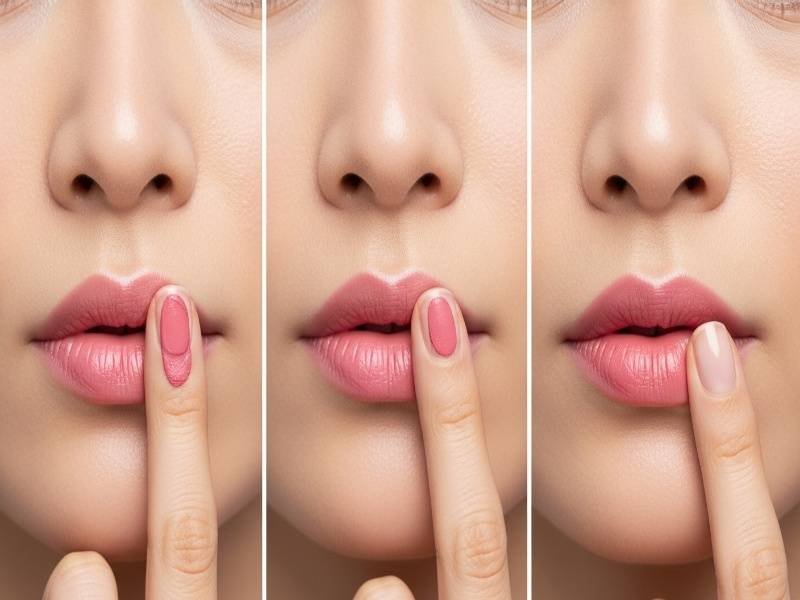
The Finger Tap Application is exactly what it sounds like. Instead of swiping a bullet across your lips or carving out lines with a brush, you pick up pigment on your ring finger and “tap” it into the skin. This does two very specific things that a brush simply cannot do.
First, the warmth of your skin melts the waxes and oils in the lipstick. This allows the pigment to merge with your lip texture rather than sitting on top of it. Second, it creates a “diffused” edge. In 2026, sharp lines are taking a backseat to soft, blurred borders that look incredibly romantic and natural.
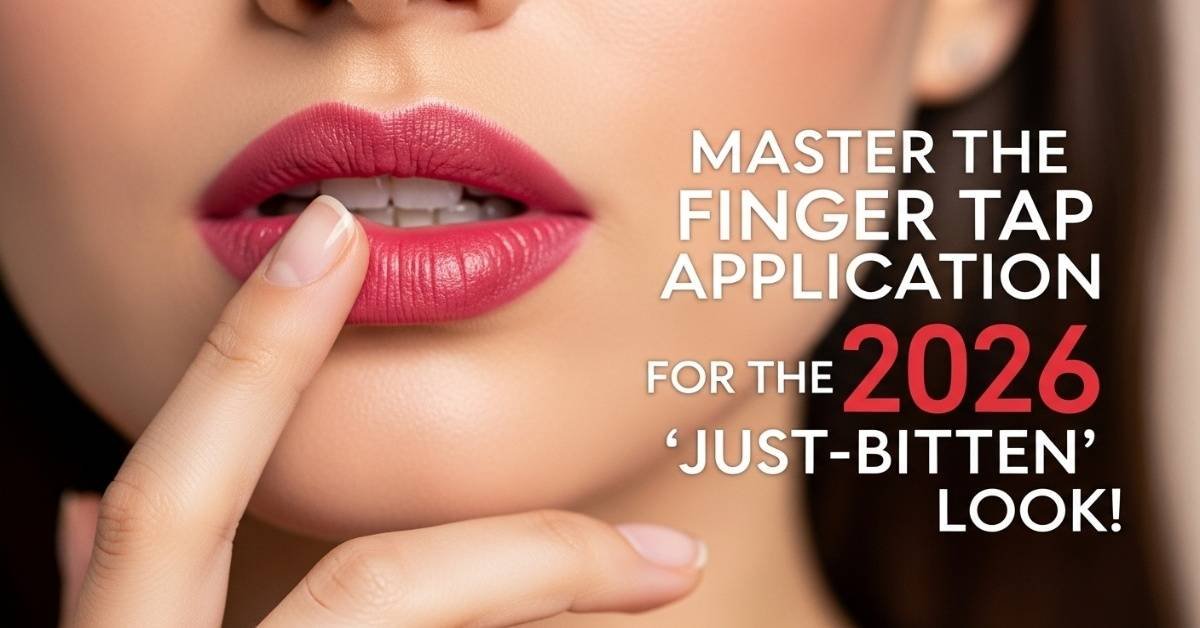
This technique is the secret behind the Just-Bitten Look. It mimics the way blood naturally rushes to the lips, giving you a healthy, flushed appearance without the weight of a traditional “full-glam” lip.
The “Just-Bitten” Look: Why It’s Taking Over 2026
We’ve spent the last decade obsessed with overlining and liquid mattes. While those looks have their place, the trend in the USA has shifted toward “Skin-First” beauty. Women want to look like they aren’t wearing much makeup, even if they spent ten minutes in front of the mirror.
The Just-Bitten Look is the ultimate “I woke up like this” vibe. It’s perfect for a Sunday brunch in Manhattan or a casual walk through a park. It’s also incredibly forgiving. Because there are no sharp lines, you don’t have to worry about your symmetry being perfect down to the millimeter.
To understand why this method is gaining so much traction, you should check out our detailed guide on what is finger tap application. It’s more than just a quick dab; it’s a lifestyle shift in how we view color.
Step-by-Step: Mastering the Finger Tap
If you’re used to the precision of a brush, letting go can feel a bit scary. I felt the same way until I realized that mistakes are actually part of the charm. Here is how you get that perfect Lip Staining effect using only your fingers.
1. Prep with a Purpose
Even for a natural look, flakes are the enemy. Use a quick scrub, but here’s the 2026 pro-tip: apply your lip balm five minutes before your color. If you apply it right before, the pigment won’t “stick” to your lips, and the Finger Tap Application will just slide around.
2. The “Ring Finger” Rule
Always use your ring finger. It is naturally the weakest finger on your hand, which means it provides the softest touch. You don’t want to “rub” the color in; you want to “stamp” it. This keeps the application light and airy.
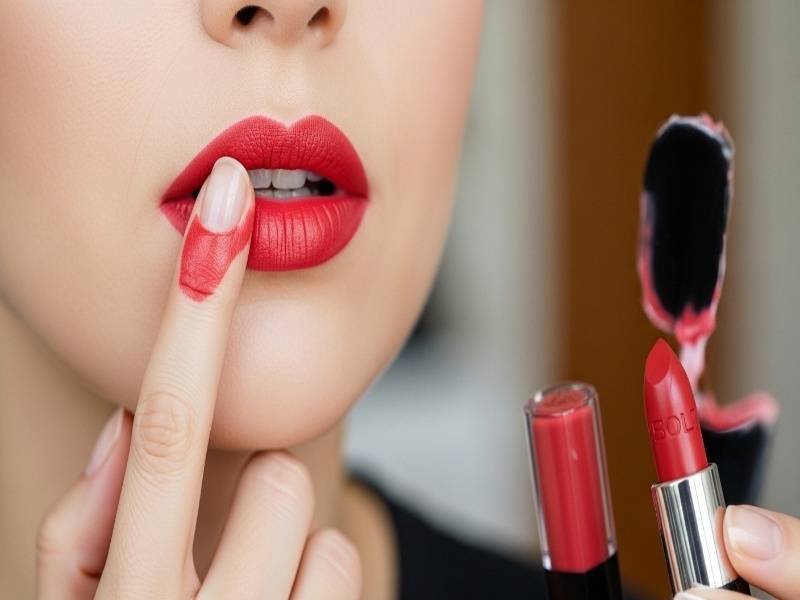
3. The Central Focus
Pick up a bit of lipstick—ideally a berry, rose, or deep red shade. Tap it onto the very center of your lips first. This is where a natural flush is deepest. Then, use whatever is left on your finger to tap outward toward the edges.
4. Blur the Border
This is the most important part of the Just-Bitten Look. Take a clean finger and lightly run it along the very edge of your lip line. You want to soften that line so it looks like the color is simply “fading” into your skin.
Finger Tap vs. Brushes: Which is Right for You?
I often get asked, “is it better to apply makeup with your fingers or a brush?” The answer is all about the finish. If you want a red carpet, high-definition look, go for the brush. But if you want to look younger and more relaxed, the finger wins every time.
There is a psychological element to it as well. There is something very intimate and “French-girl” about dabbing on your lipstick with your fingers. It feels less like a chore and more like an art form.
For a deeper dive into this comparison, read our article on finger tap application vs brushes. It breaks down the science of skin warmth and how it changes the way products actually look on your face.
Can You Use Fingers for the Rest of Your Face?
Once you master the lips, you’ll start wondering, “is it okay to use fingers to apply makeup?” specifically for your foundation or blush. The answer is a resounding yes! In fact, many high-end makeup artists in the USA prefer it.
For foundation, the Finger Tap Application prevents the “mask” look. It allows you to feel the texture of your skin and only add coverage where you actually need it. If you’re asking, “how to apply matte foundation with fingers?”, the trick is to work in small sections. Matte formulas dry fast, so you need the heat of your fingers to keep the product “movable.”
And don’t forget the blush! Many women ask, “can I use my finger for blush?” Not only can you, but you should. Tapping a cream blush onto the apples of your cheeks gives a seamless blend that looks like a natural glow from within.
Making Old Lips Look Younger
One of the biggest struggles I hear from women in their 40s and 50s is that lipstick makes them look older. Traditional application can settle into fine lines and look “harsh.” If you are searching for “how to make old lips look younger?”, the finger tap is your best friend.
By avoiding heavy liners and using the Finger Tap Application, you avoid the “bleeding” that often happens with age. The soft edges make the lips look fuller and more hydrated. It’s an instant “youth-boost” that takes seconds to achieve.
It’s about embracing the “glow” rather than the “cover.” When we stop trying to paint over our features and start enhancing them with soft, diffused color, that’s when the real magic happens.

Final Thoughts: The Beauty of the Blur
The 2026 Just-Bitten Look isn’t just a trend; it’s a return to simplicity. We’ve spent so much time trying to be “perfect” that we forgot how beautiful “natural” can be. My morning routine has become a moment of self-care rather than a stressful battle with a lip liner.
Mastering the Finger Tap Application gave me back my confidence. I no longer worry if my lipstick is perfectly symmetrical or if it’s smudging. The “blur” is the goal, and that freedom is incredibly empowering.
Whether you’re a beginner or a pro, I encourage you to put down the brushes tomorrow morning. Use your hands, feel the texture of your skin, and enjoy the effortless beauty that only your own touch can create.
❓ Frequently Asked Questions (PAA Style)
1. How to apply lipstick with fingers? Load your ring finger with pigment from the lipstick bullet. Start by tapping the color into the center of your lips (the “inner” part). Gradually tap the remaining color outward toward the edges, using a clean finger to blur the final border for a soft-focus finish.
2. Is it okay to use fingers to apply makeup? Yes, it is more than okay! The warmth of your fingers helps cream-based products like lipstick, concealer, and blush melt into the skin for a more natural, “skin-like” finish. Just ensure your hands are clean to prevent any breakouts.
3. What is the two-finger rule for blush? When applying blush with your fingers, place two fingers next to your nose. This “no-fly zone” ensures you don’t bring the color too close to the center of your face, which can make you look flushed in an unnatural way. Apply the color from that point outward toward the temples.
4. Can you blend with fingers? Absolutely. Blending with fingers is often superior for cream and liquid products. The tapping motion (stippling) allows you to build coverage without moving the product underneath, which is a common problem when using brushes.
5. How to make old lips look younger? Avoid heavy, dark liners which can look harsh. Instead, use a mid-tone rose or berry shade with the Finger Tap Application. This creates a soft, diffused edge that masks fine lines and gives the illusion of a fuller, more hydrated pout